Today, we launch in beta our new Migration Assistant. We’ve been overwhelmed with requests from clients to help them get their members off of their current system and onto PushPress, so we designed a super simple and easy way to manage that process.
So simple, its 3, 2, 1 (GO!) steps.
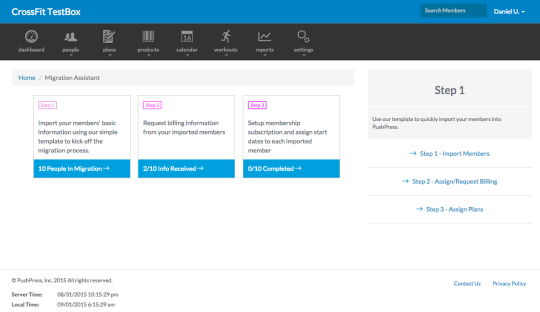
Step 1: Importing User Records
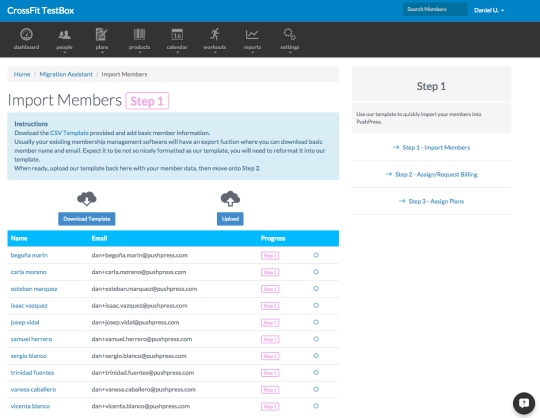
As per usual, we believe in automagic and simple. All you have to do is fill out a minimum amount of information (usually exportable from your current system) and save the data in a .csv file. We even provide you with a sample CSV file to start with.
Step 2: Getting Billing Data
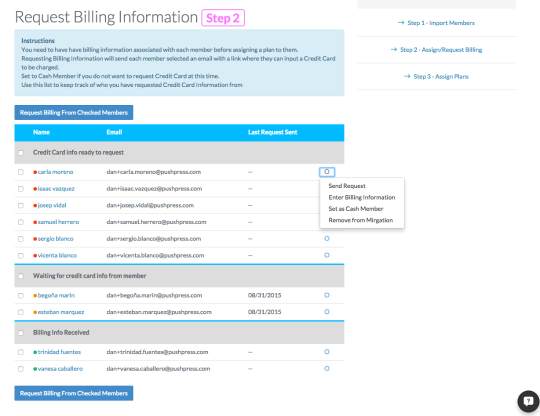
This is the worst of the steps, but thankfully we’ve come up with a pretty simple, fast, and effective way to manage it. From the list of migrating members, you can quickly see who you’ve requested billing information from, and who has entered their information.
You can quickly fire off requests for billing information to many people at once. You also can manually enter their billing information if you have them in front of you, push them forward as a cash client, or remove them from migration altogether.
Step 3: Assigning Membership Plans and Start Dates
The last step is the fun one. On step 3, you’ll see which members have their payment info in place. From here you can assign them the membership plan and what day to begin billing on PushPress.
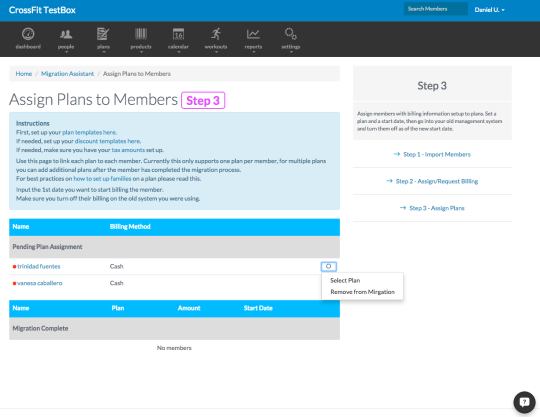
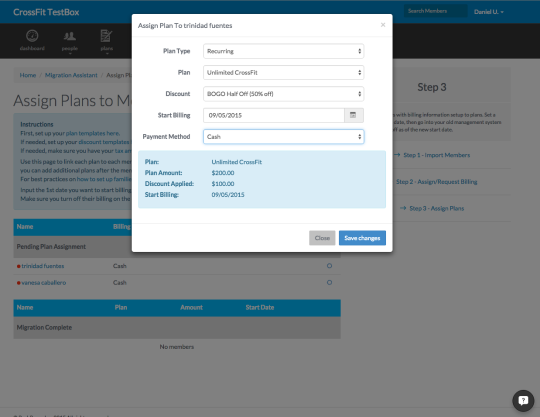
And that’s it. Once you set up their plan and billing start date on PushPress, you simply go into your old system and turn their membership off so it will not rebill. We will pick up the billing on the date you select.
Just another way we’re looking to simplify your lives and keep you doing what you love - training clients…. not stuck in front of a computer trying to manage your business.


